-
Differential Pressure Gauge
-
Digital Pressure Gauge
-
Stainless Steel Pressure Gauge
-
Precision Pressure Transmitter
-
Programmable Logic Controller
-
Float Level Switch
-
Pneumatic Valve Positioner
-
Temperature Transmitter Sensor
-
Hart Field Communicator
-
Solenoid Valve
-
Control Valves
-
High Accuracy Flow Meter
-
Submersible Water Pump
-
Pressure Transmitter Manifold
-
Ultrasonic Level Meter
-
Voltage Current Power Meter
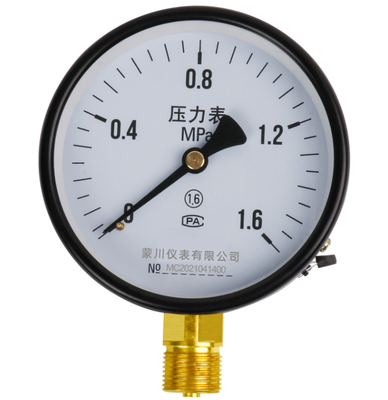
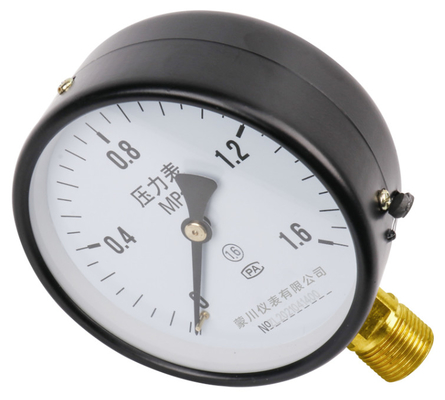
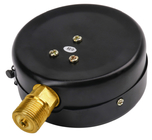
CCC Y100 Radial Pressure Gauge 100mm Copper Joint Iron Shell M20*1.5
| Product Name | Radial Pressure Gauge | Accuracy | 1.6% |
|---|---|---|---|
| Size | 100mm | Connection Thread | M20*1.5 |
| Accuracy | 1.6% | Certification | CCC |
| Highlight | CCC Y100 radial pressure gauge,radial pressure gauge 100mm,100mm Copper Pressure Gauge |
||
MC CCC Y100 100mm M20*1.5 radial copper joint iron shell pressure gauge
Pressure gauge
Instrument for measuring the condition of a fluid (liquid or gas) that is specified by the force that the fluid would exert, when at rest, on a unit area, such as pounds per square inch or newtons per square centimetre.
The reading on a gauge, which is the difference between two pressures, is known as the gauge pressure. If the lower of the pressures is the pressure of the atmosphere, the total, or absolute, pressure is the sum of the gauge and atmospheric pressures.
The simplest device for measuring static pressures up to about 90 pounds per square inch (62 newtons per square cm) is a U-tube manometer (shown in the figure), in which one column of a liquid in the tube is open to a region of high pressure and the other column to a region of low pressure. The differential pressure is indicated by the difference in level between the two columns of liquid, and it is calculated as the difference in level multiplied by the density of the liquid. The manometer liquids most commonly used are mercury, oil, alcohol, and water.
Sepcification
|
Size: |
100mm |
|
Operating Temperature |
-40 - 70
|
|
Window: |
Safety Glass
|
|
Model Number: |
Y100
|
|
Connection thread: |
M20*1.5
|
|
Pressure range: |
0 ~ 60mPa
|
|
Connection thread: |
M20*1.5
|
|
Accuracy: |
1.6% |
![]()
![]()
![]()
![]()
![]()
Manometer pressure gauges measure pressure on a fluid by balancing one column of fluid against a second column of fluid. This type of pressure gauge is the simplest type and consists of a transparent tube in the form of a “U” that is partially filled with a manometric fluid like mercury.
Absolute pressure gauges are used to measure pressure independent of the natural fluctuations in atmospheric pressure. A reference vacuum is attached to the side of the measuring element, which is not subject to pressure; it has zero pressure with no variation.
Capsule pressure gauge: The sensitive element of the bellows is composed of two diaphragms connected together with circular waves. The pressure of the measuring medium acts on the inside of the capsule cavity, and the resulting deformation can be used to indirectly measure the pressure of the medium. The size of the pressure value is displayed by the pointer. The bellows pressure gauge is generally used to measure the pressure of the gas, and can measure the micro pressure, and the overpressure protection is also possible to a certain extent. When several capsule sensitive components are stacked together, they will produce a large transmission force to measure extremely small pressure.
Main structure
Overflow hole: In the event of an emergency that the Bourdon tube bursts, the internal pressure will be released to the outside through the overflow hole to prevent the glass panel from bursting. Note: In order to maintain the normal performance of the overflow hole, a space of at least 10mm must be left behind the table, and the overflow hole cannot be modified or plugged.
Pointer: In addition to standard pointers, other pointers are also optional.
Glass panel: In addition to standard glass, other special material glass, such as tempered glass, and non-reflective glass are also optional.
Performance classification: ordinary type (standard), ordinary type for steam (M), heat resistant type (H), vibration resistant type (V), vibration resistant type for steam (MV) heat resistant and vibration resistant type (HV).
Treatment method: oil-free/water-free treatment to remove the water or oil remaining in the wetted part during manufacturing.
Exterior designation: The shell color must be specified in addition to the standard color.
Throttle valve (optional): In order to reduce the pulsating pressure, the throttle valve is installed at the pressure inlet.
Use attention
1. The meter must be vertical: a 17mm wrench should be used for tightening during installation, and the case should not be forcibly twisted; collisions should be avoided during transportation;
2. The temperature of the surrounding environment should be -25~55℃;
3. The vibration frequency of the working environment is less than 25HZ, and the amplitude is not more than 1mm;
4. Due to the high ambient temperature during use, the indicating value of the instrument does not return to zero or the indicating value is out of tolerance, you can cut the sealing rubber plug on the upper part of the case to make the inner cavity of the instrument communicate with the atmosphere;
5. The use range of the instrument should be between 1/3 and 2/3 of the upper limit;
6. Isolation devices should be added when measuring corrosive media, media that may crystallize, and media with high viscosity;
7. The meter should be checked frequently (at least once every three months), and if any malfunction is found, it should be repaired in time;
Selection principle
The selection of the pressure gauge should be based on the production requirements of the use process, and specific analysis should be made for the specific situation. On the premise of meeting the technological requirements, comprehensive consideration should be given to the principle of economy. Generally, the following aspects should be considered:
1. Selection of type
The selection of instrument type must meet the requirements of process production. For example, whether remote transmission, automatic recording or alarm is required; whether the nature of the measured medium (such as the temperature of the measured medium, viscosity, corrosiveness, degree of contamination, flammable and explosive, etc.) puts forward special requirements for the instrument, on-site Environmental conditions (such as humidity, temperature, magnetic field strength, vibration, etc.) require the type of instrument, etc. Therefore, the correct selection of the instrument type according to the process requirements is an important prerequisite for ensuring the normal operation of the instrument and safe production.
For example, the spring tube of the ordinary pressure gauge is mostly made of copper alloy (alloy steel is used for high pressure), while the material of the spring tube of the pressure gauge for ammonia is all carbon steel (or stainless steel), and copper alloy is not allowed. Because ammonia reacts with copper and will explode, ordinary pressure gauges cannot be used for ammonia pressure measurement.
The oxygen pressure gauge and the ordinary pressure gauge can be exactly the same in terms of structure and material, but the oxygen pressure gauge must be oil-free. Because oil enters the oxygen system and can easily cause an explosion. When calibrating the oxygen pressure gauge used, oil cannot be used as the working medium like ordinary pressure gauges, and the oxygen pressure gauge must be stored strictly to avoid contact with oil. If it is necessary to use the existing oily pressure gauge to measure the oxygen pressure, it must be repeatedly cleaned with carbon tetrachloride before use, and carefully checked until there is no oil.
2. Determination of the measurement range
In order to ensure that the elastic element can work reliably within the safe range of elastic deformation, when selecting the pressure gauge range, there must be enough room according to the size of the measured pressure and the speed of the pressure change. Therefore, the upper limit of the pressure gauge It should be higher than the maximum pressure value possible in process production. According to "Technical Regulations for Chemical Automatic Control Design", when measuring stable pressure, the maximum working pressure should not exceed 2/3 of the upper limit of measurement; when measuring pulsating pressure, the maximum working pressure should not exceed 1/2 of the upper limit of measurement; When measuring high pressure, the maximum working pressure should not exceed 3/5 of the upper limit of the measurement. Generally, the minimum value of the measured pressure should not be lower than 1/3 of the upper limit of the instrument measurement. So as to ensure the linear relationship between the output of the meter and the input
After calculating the upper and lower limits of the meter based on the maximum and minimum values of the measured parameters, this value cannot be directly used as the measuring range of the meter. When we select the upper limit of the scale of the instrument, it should be selected from the standard series prescribed by the country. The standard series of pressure gauge measurement ranges in China are: -0.1-0.06,0.15; 0-1,1.6,2.5,4,6,10X10" MPa (where n is a natural integer. It can be positive or negative).
3. Selection of accuracy level
According to the maximum absolute error allowed by the process production and the maximum range of the selected instrument, the maximum quoted error allowed by the instrument is calculated, and the accuracy of the instrument is determined in the accuracy class specified by the country. Generally speaking, the more precise the instrument selected, the more accurate and reliable the measurement result will be. However, it cannot be considered that the higher the accuracy of the selected instrument
Usage
![]()
Sepcification
|
Size: |
100mm
|
|
|
|
|
|
|
|
|
|
|
|
|
|
|


